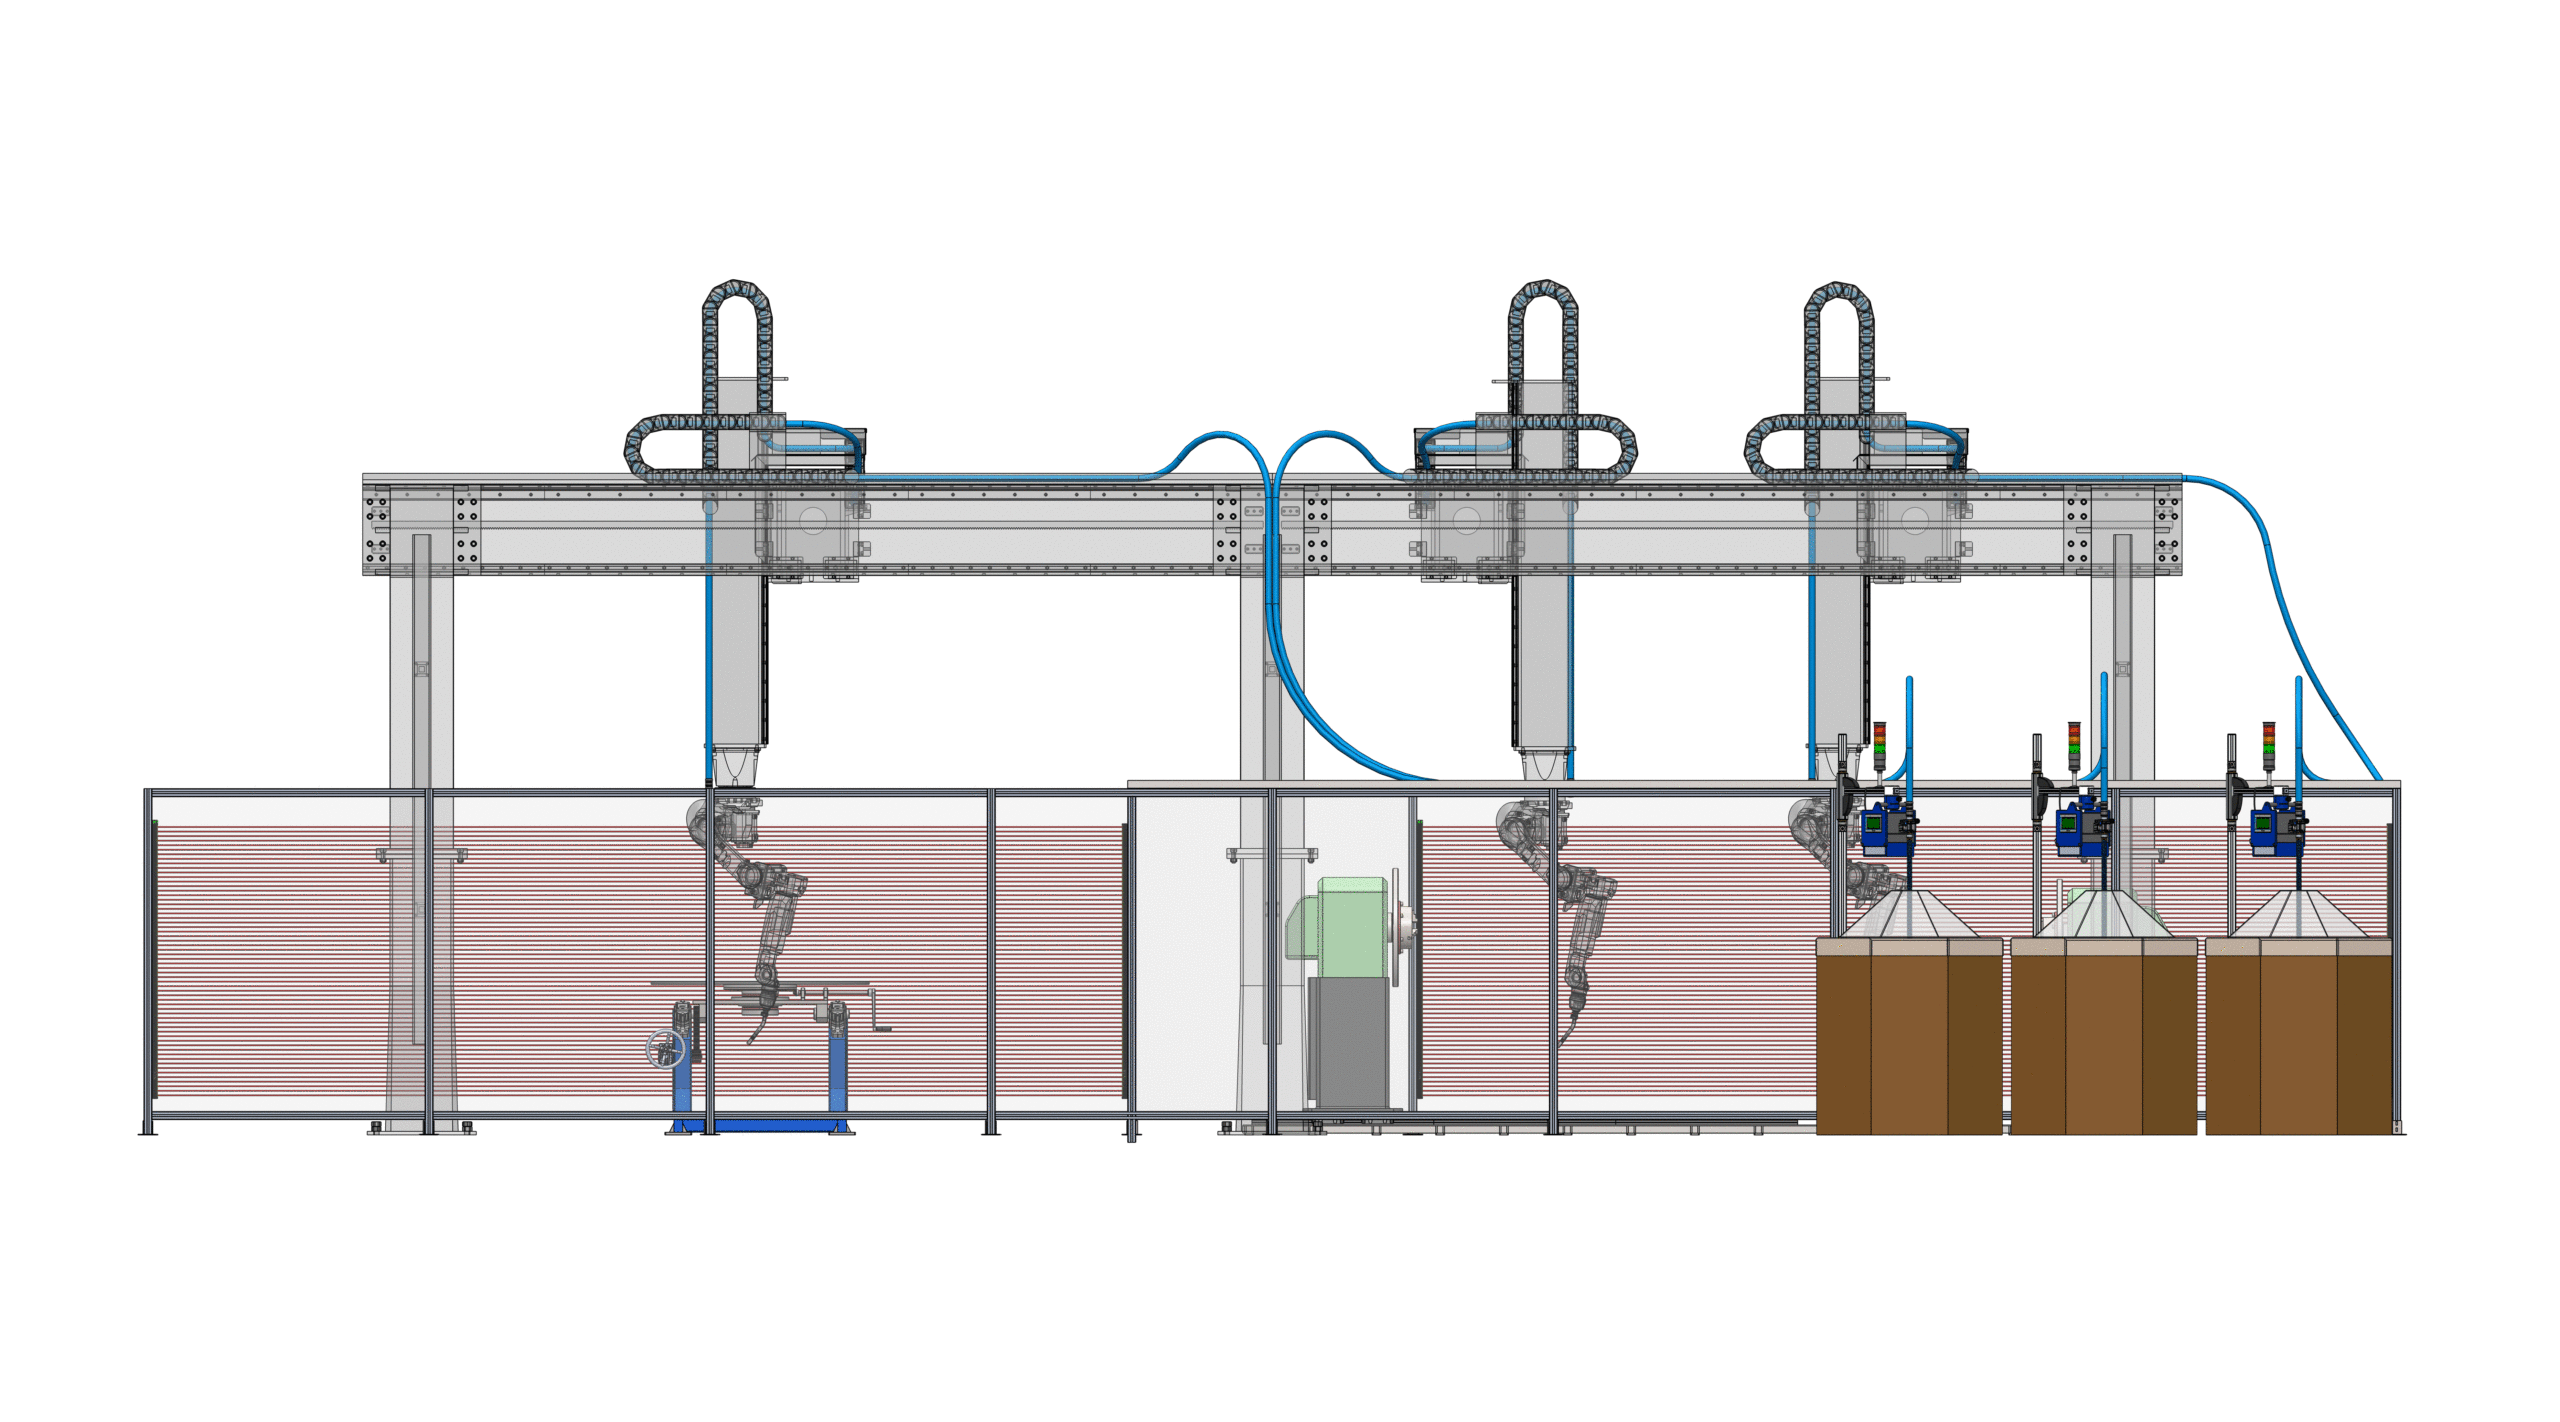
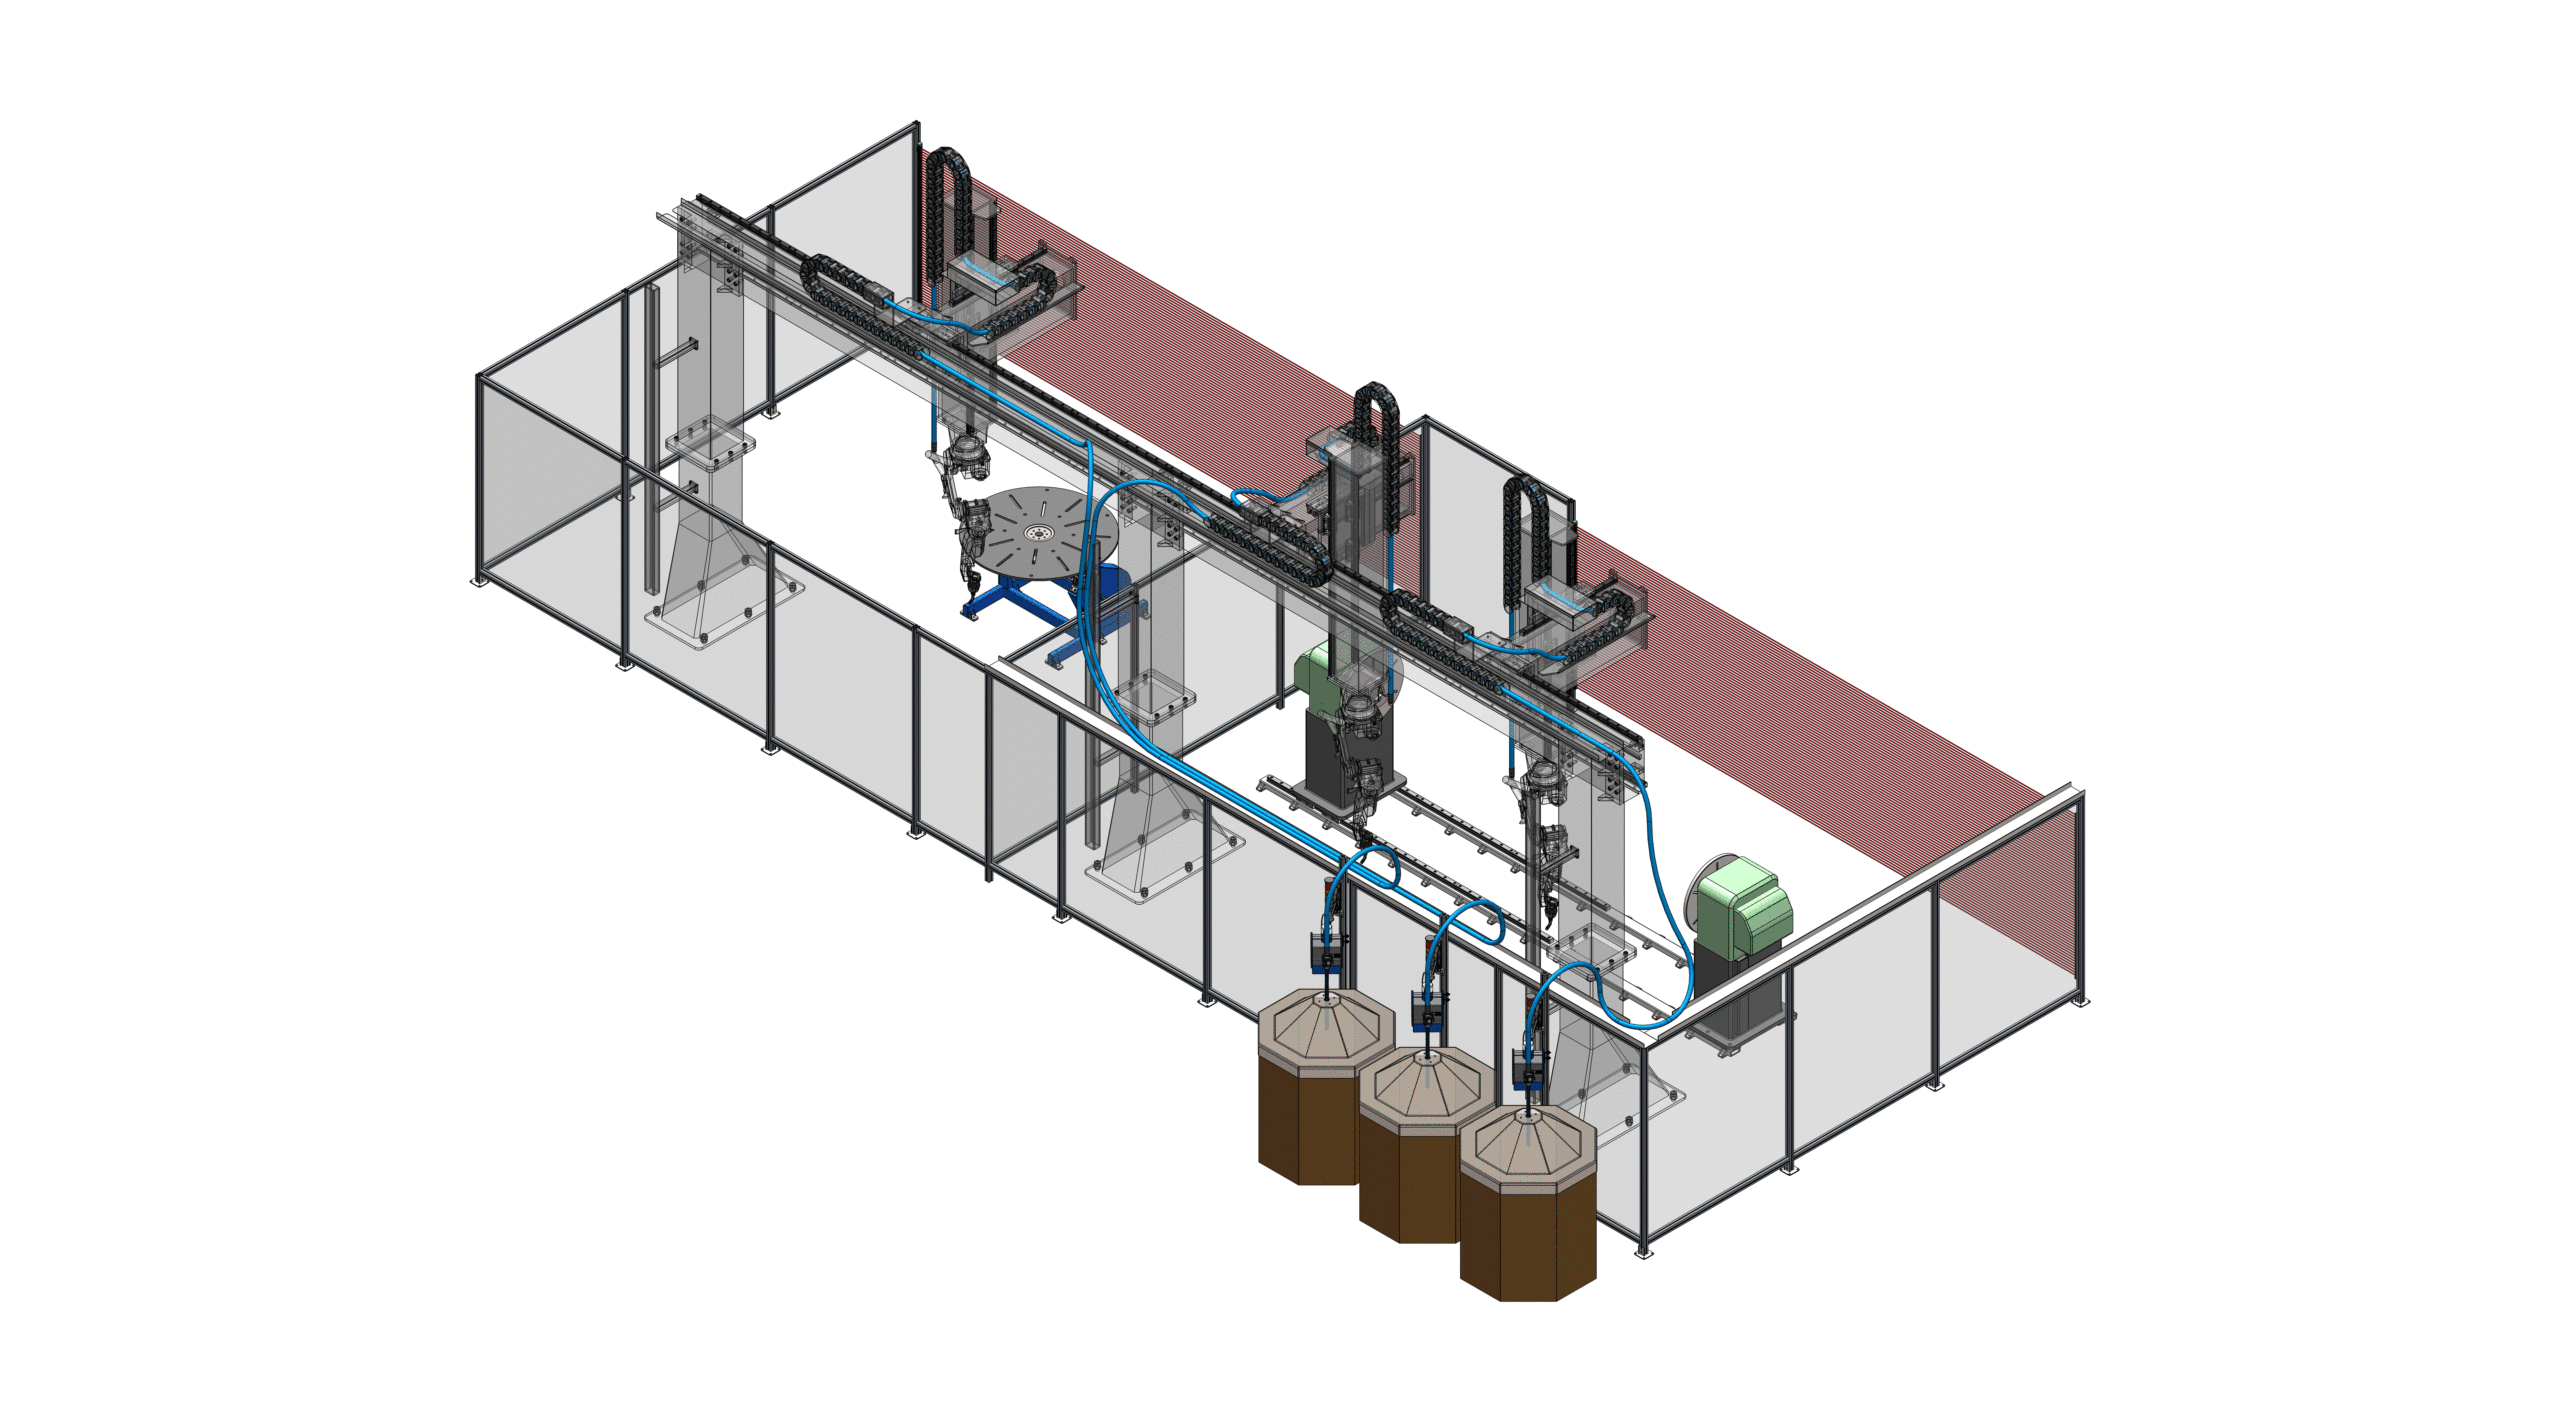
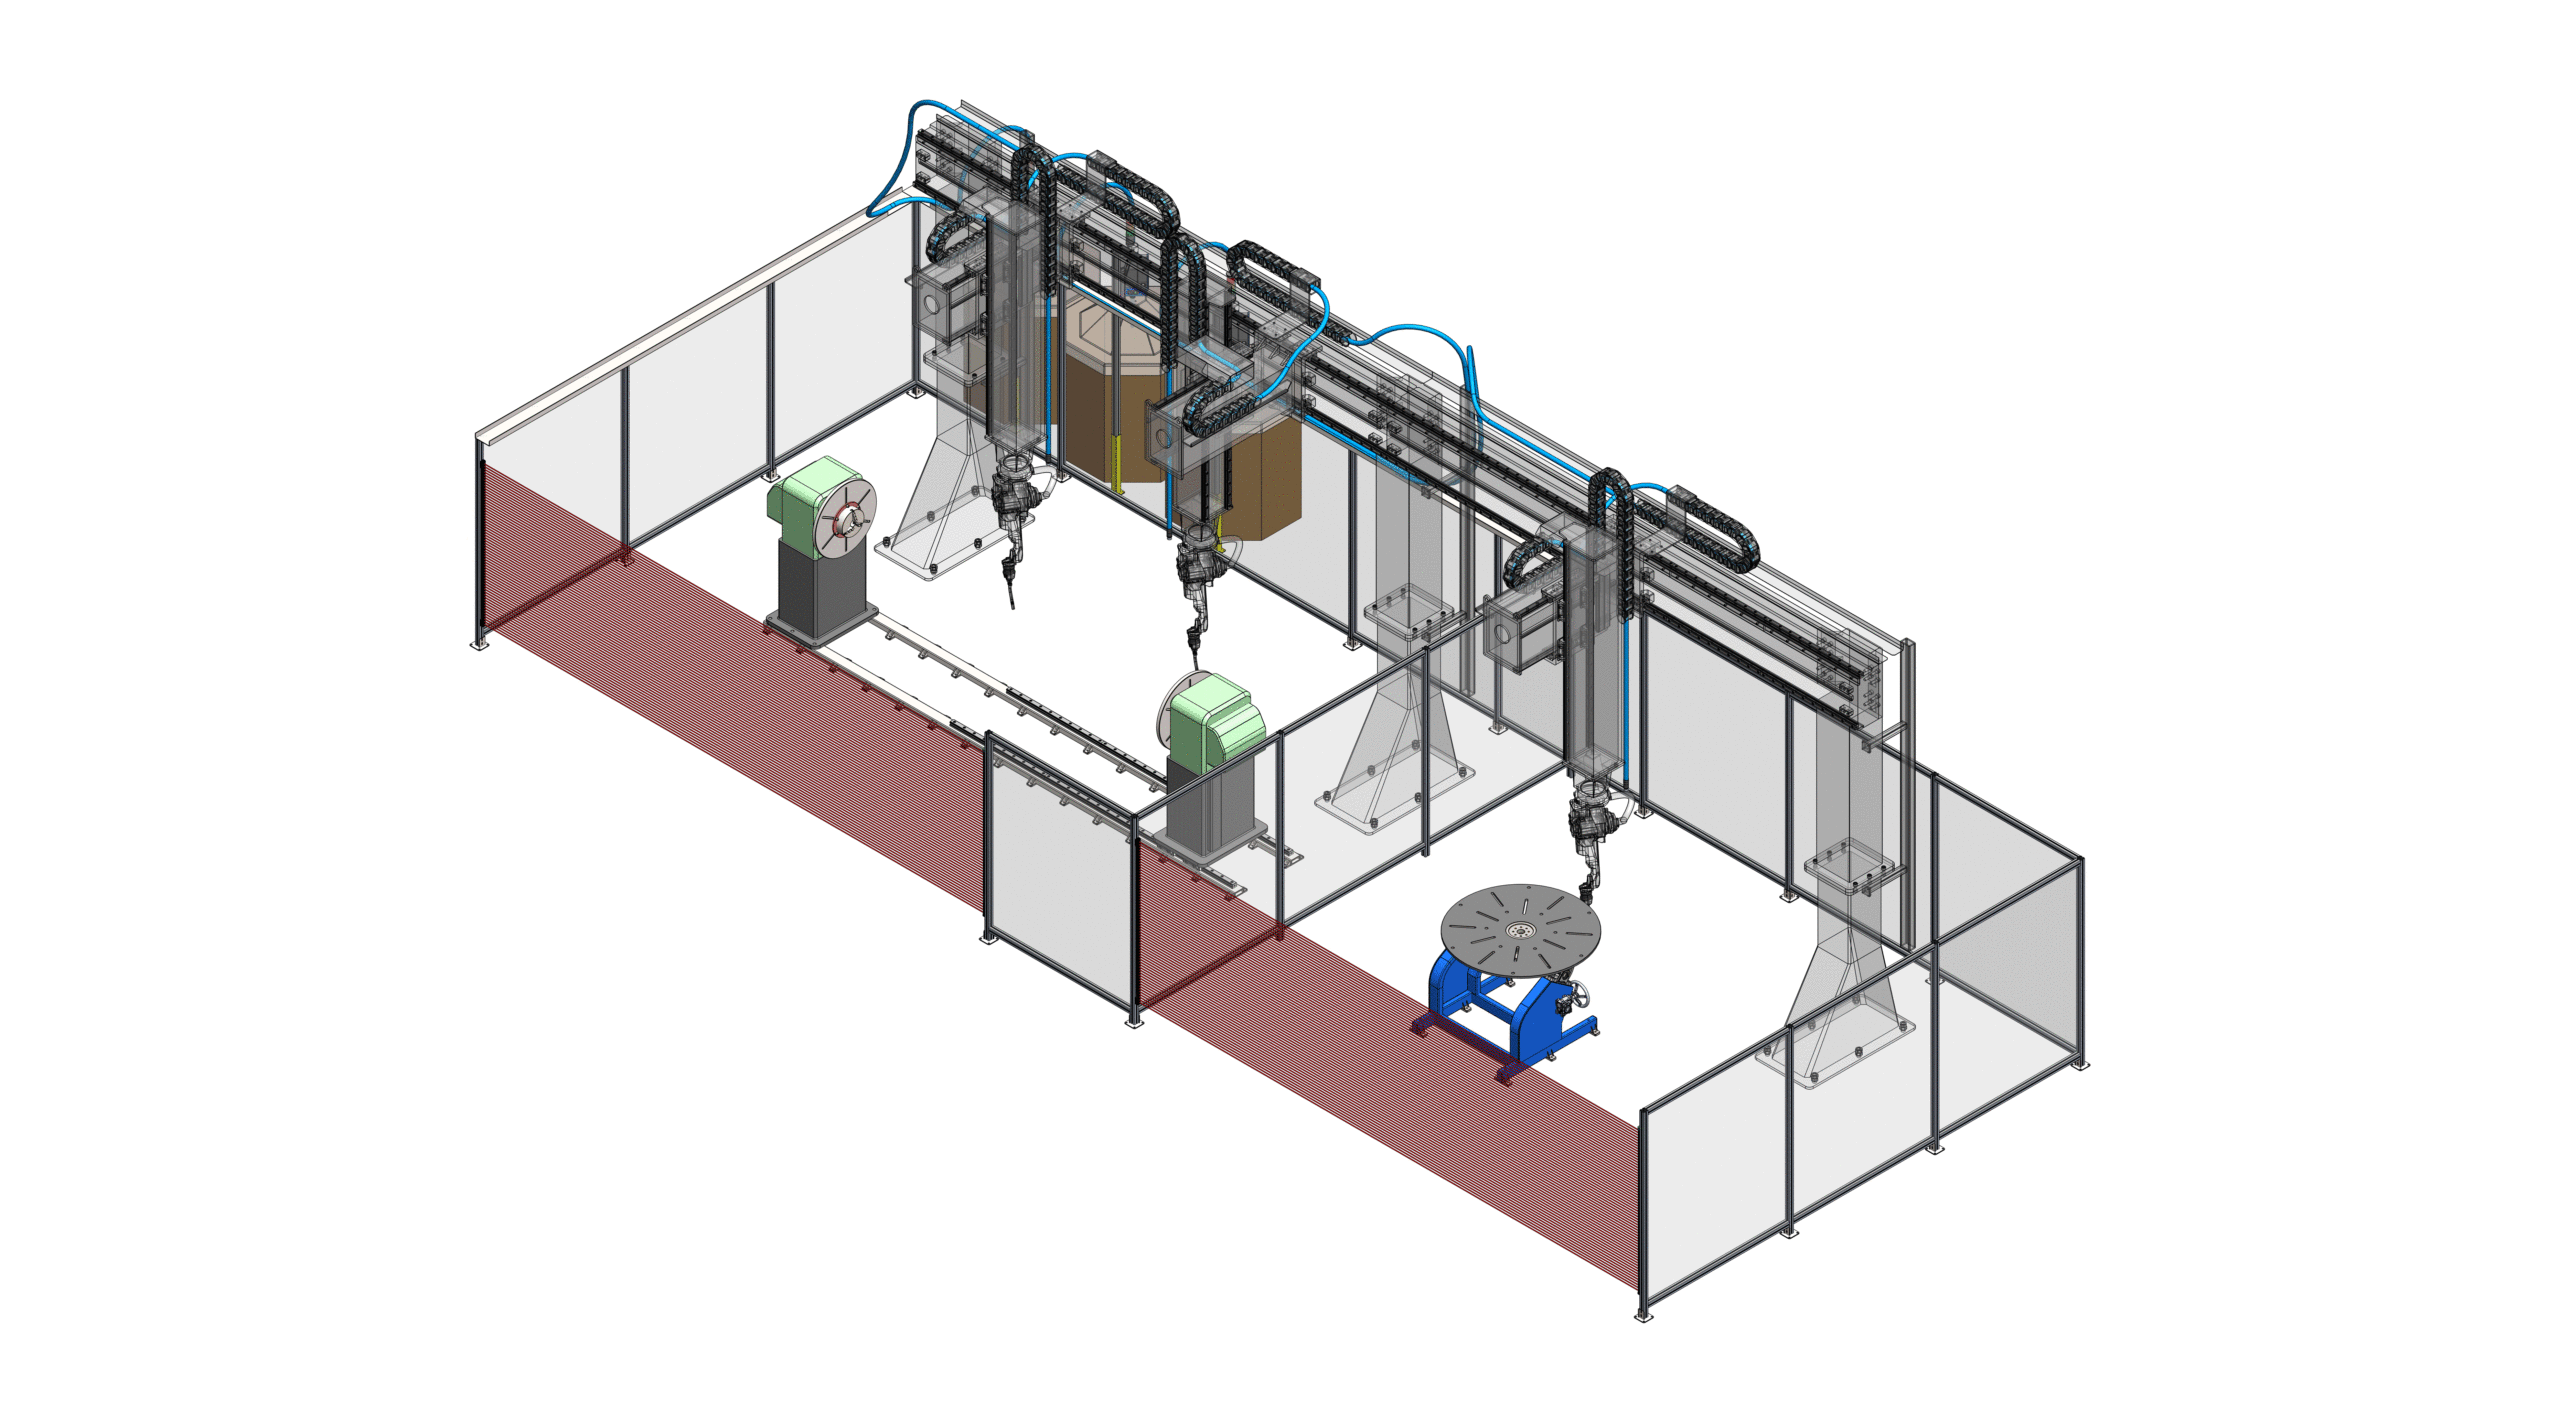
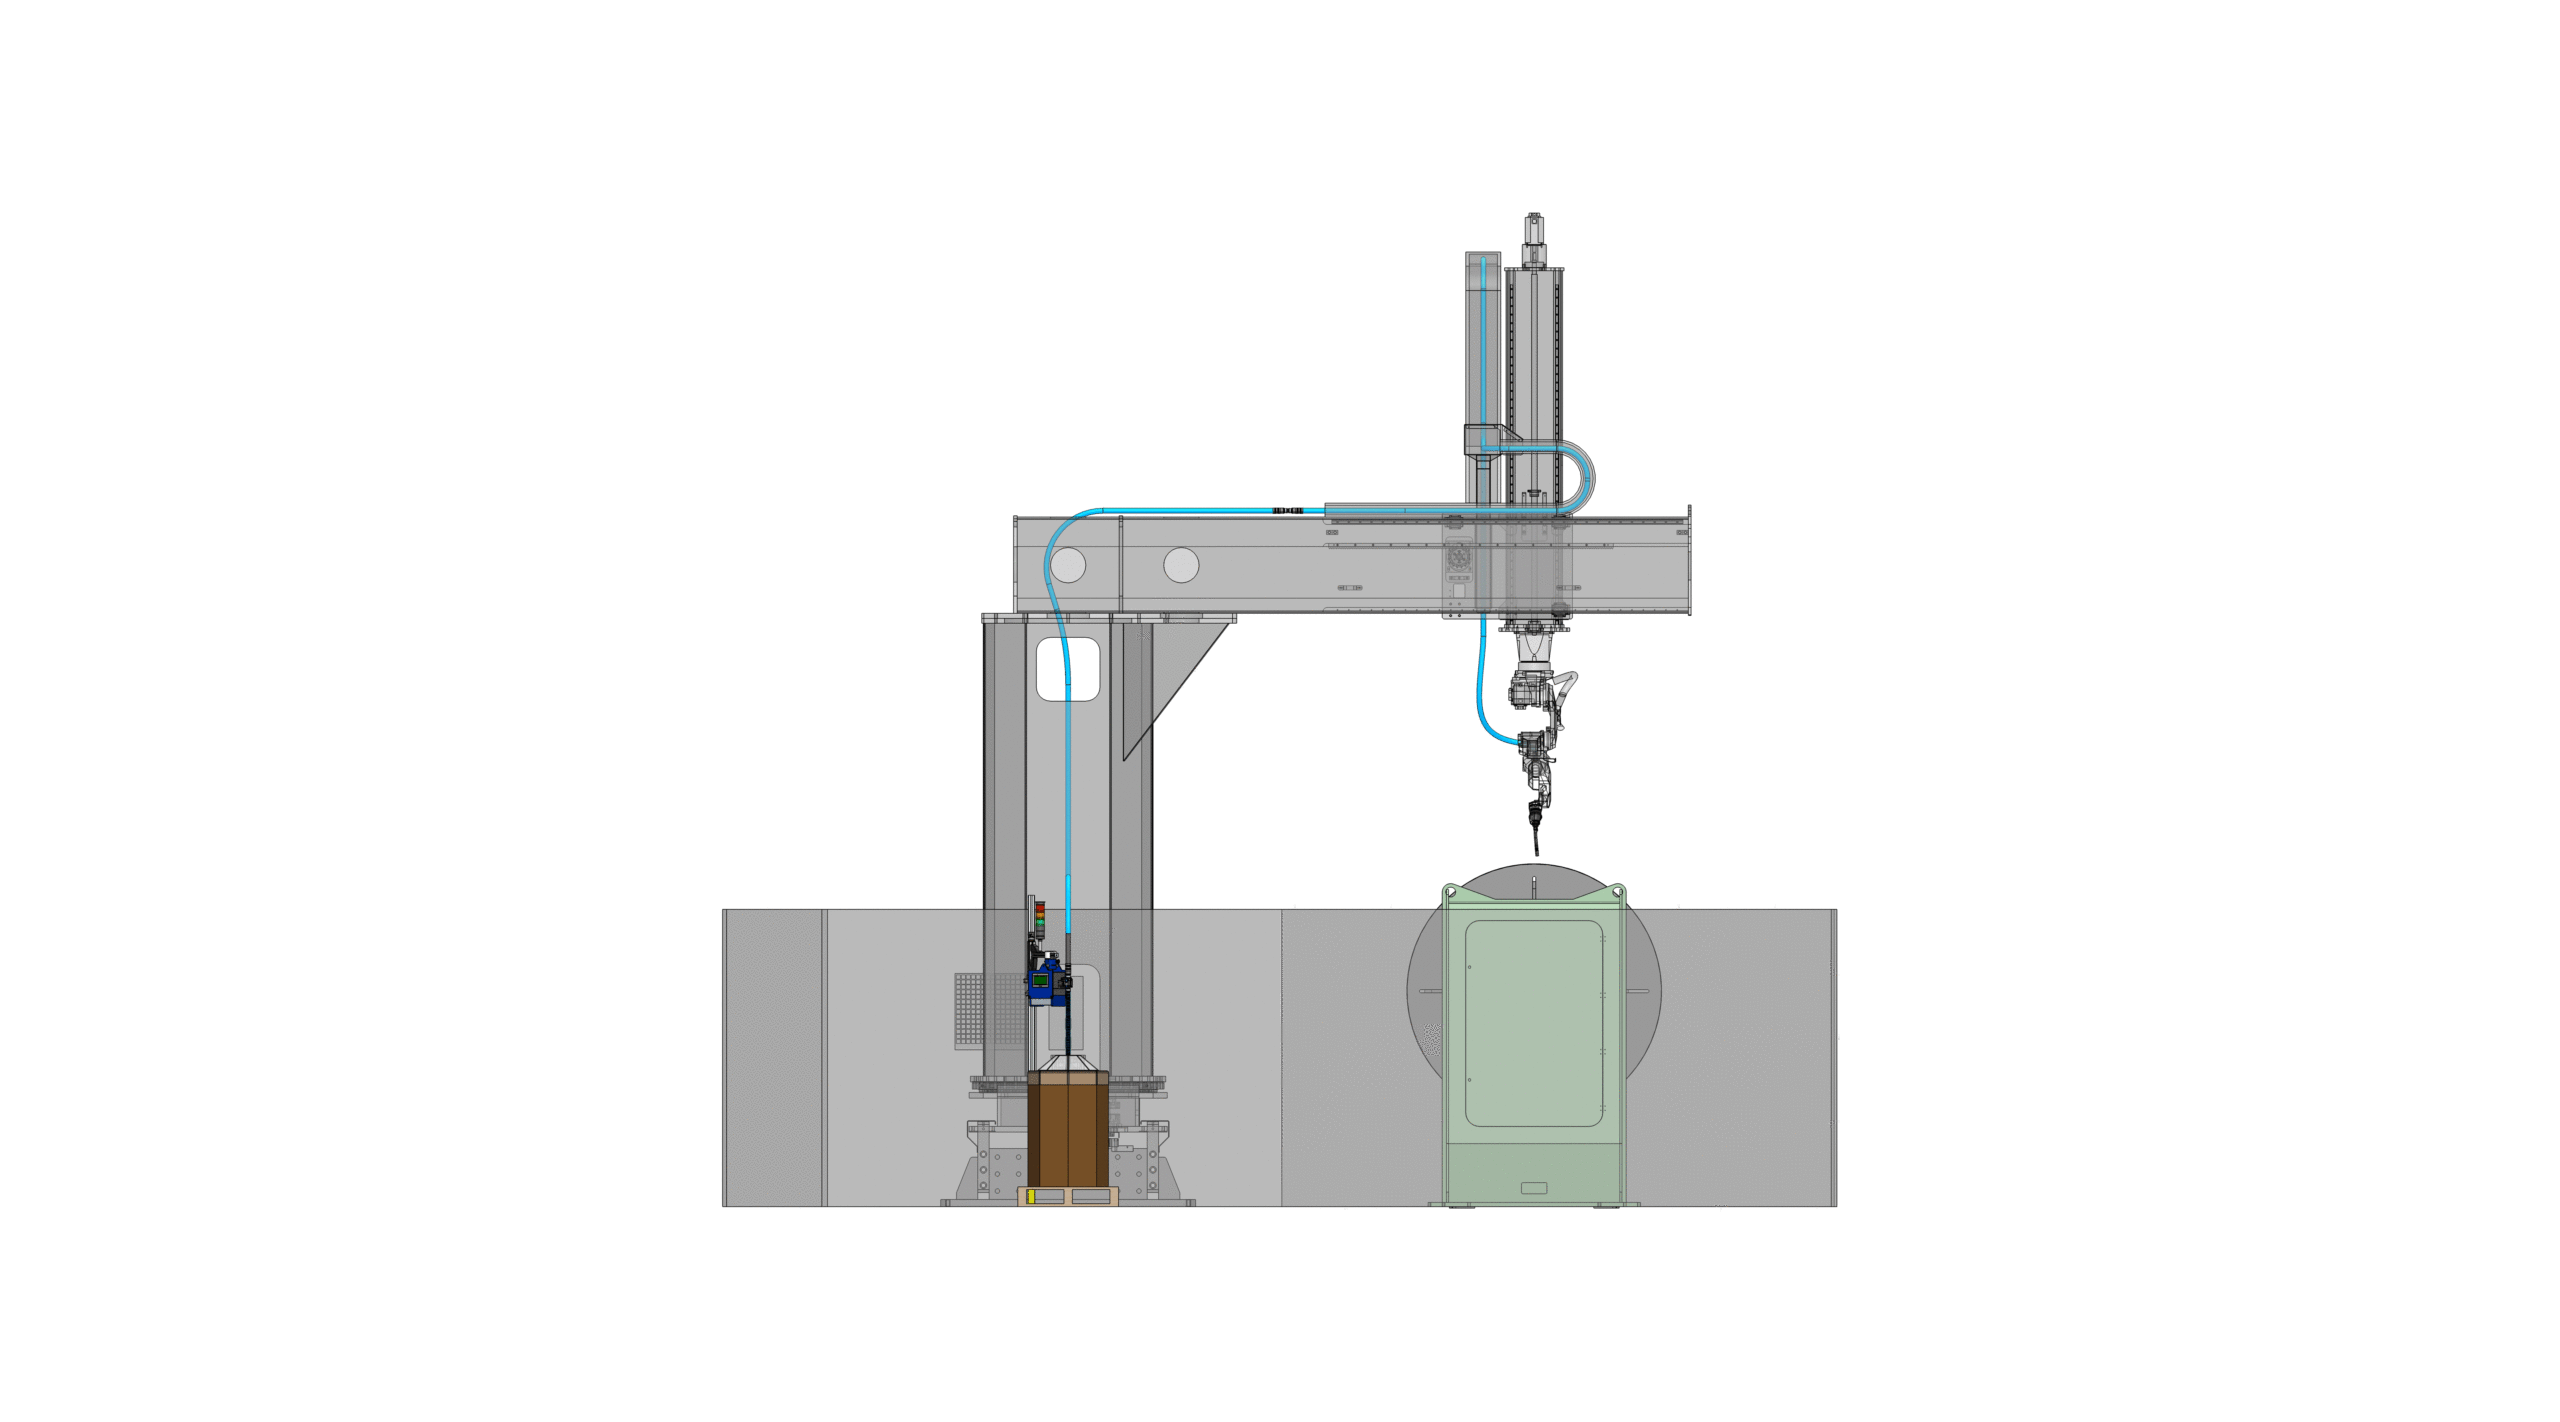
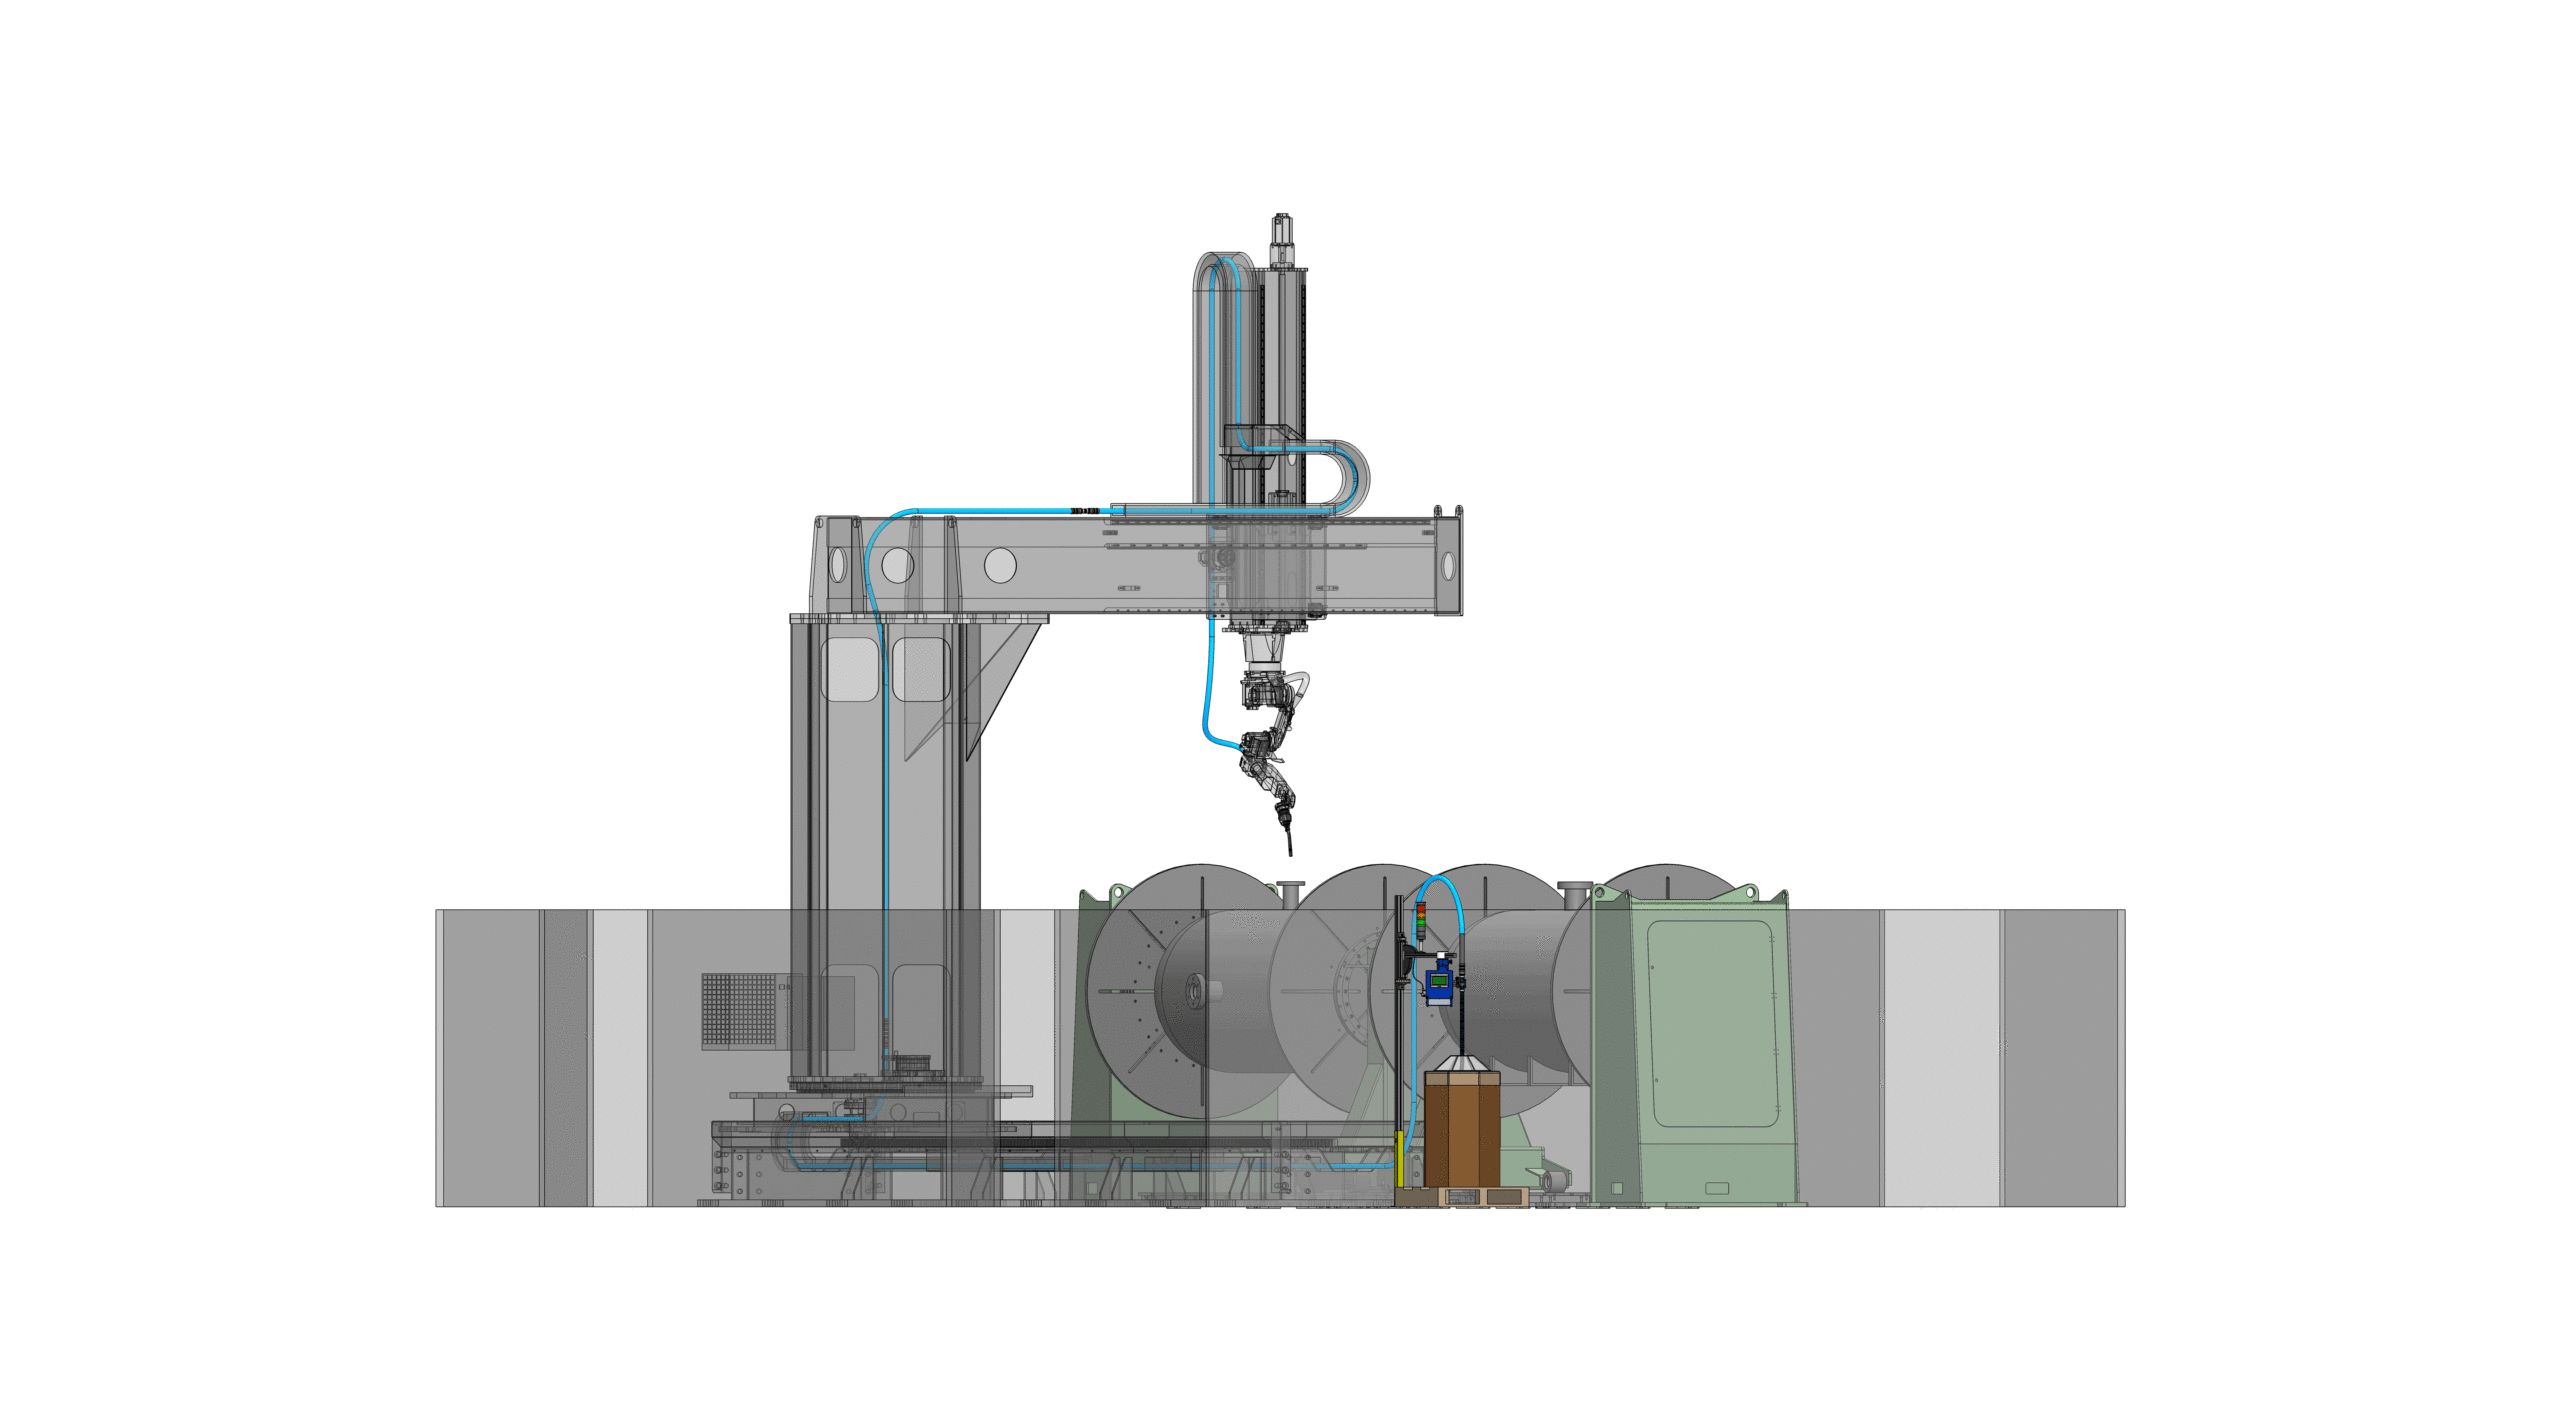
Examples of gantries with wire bulk packs placed safely on the floor and outside the robot welding cell
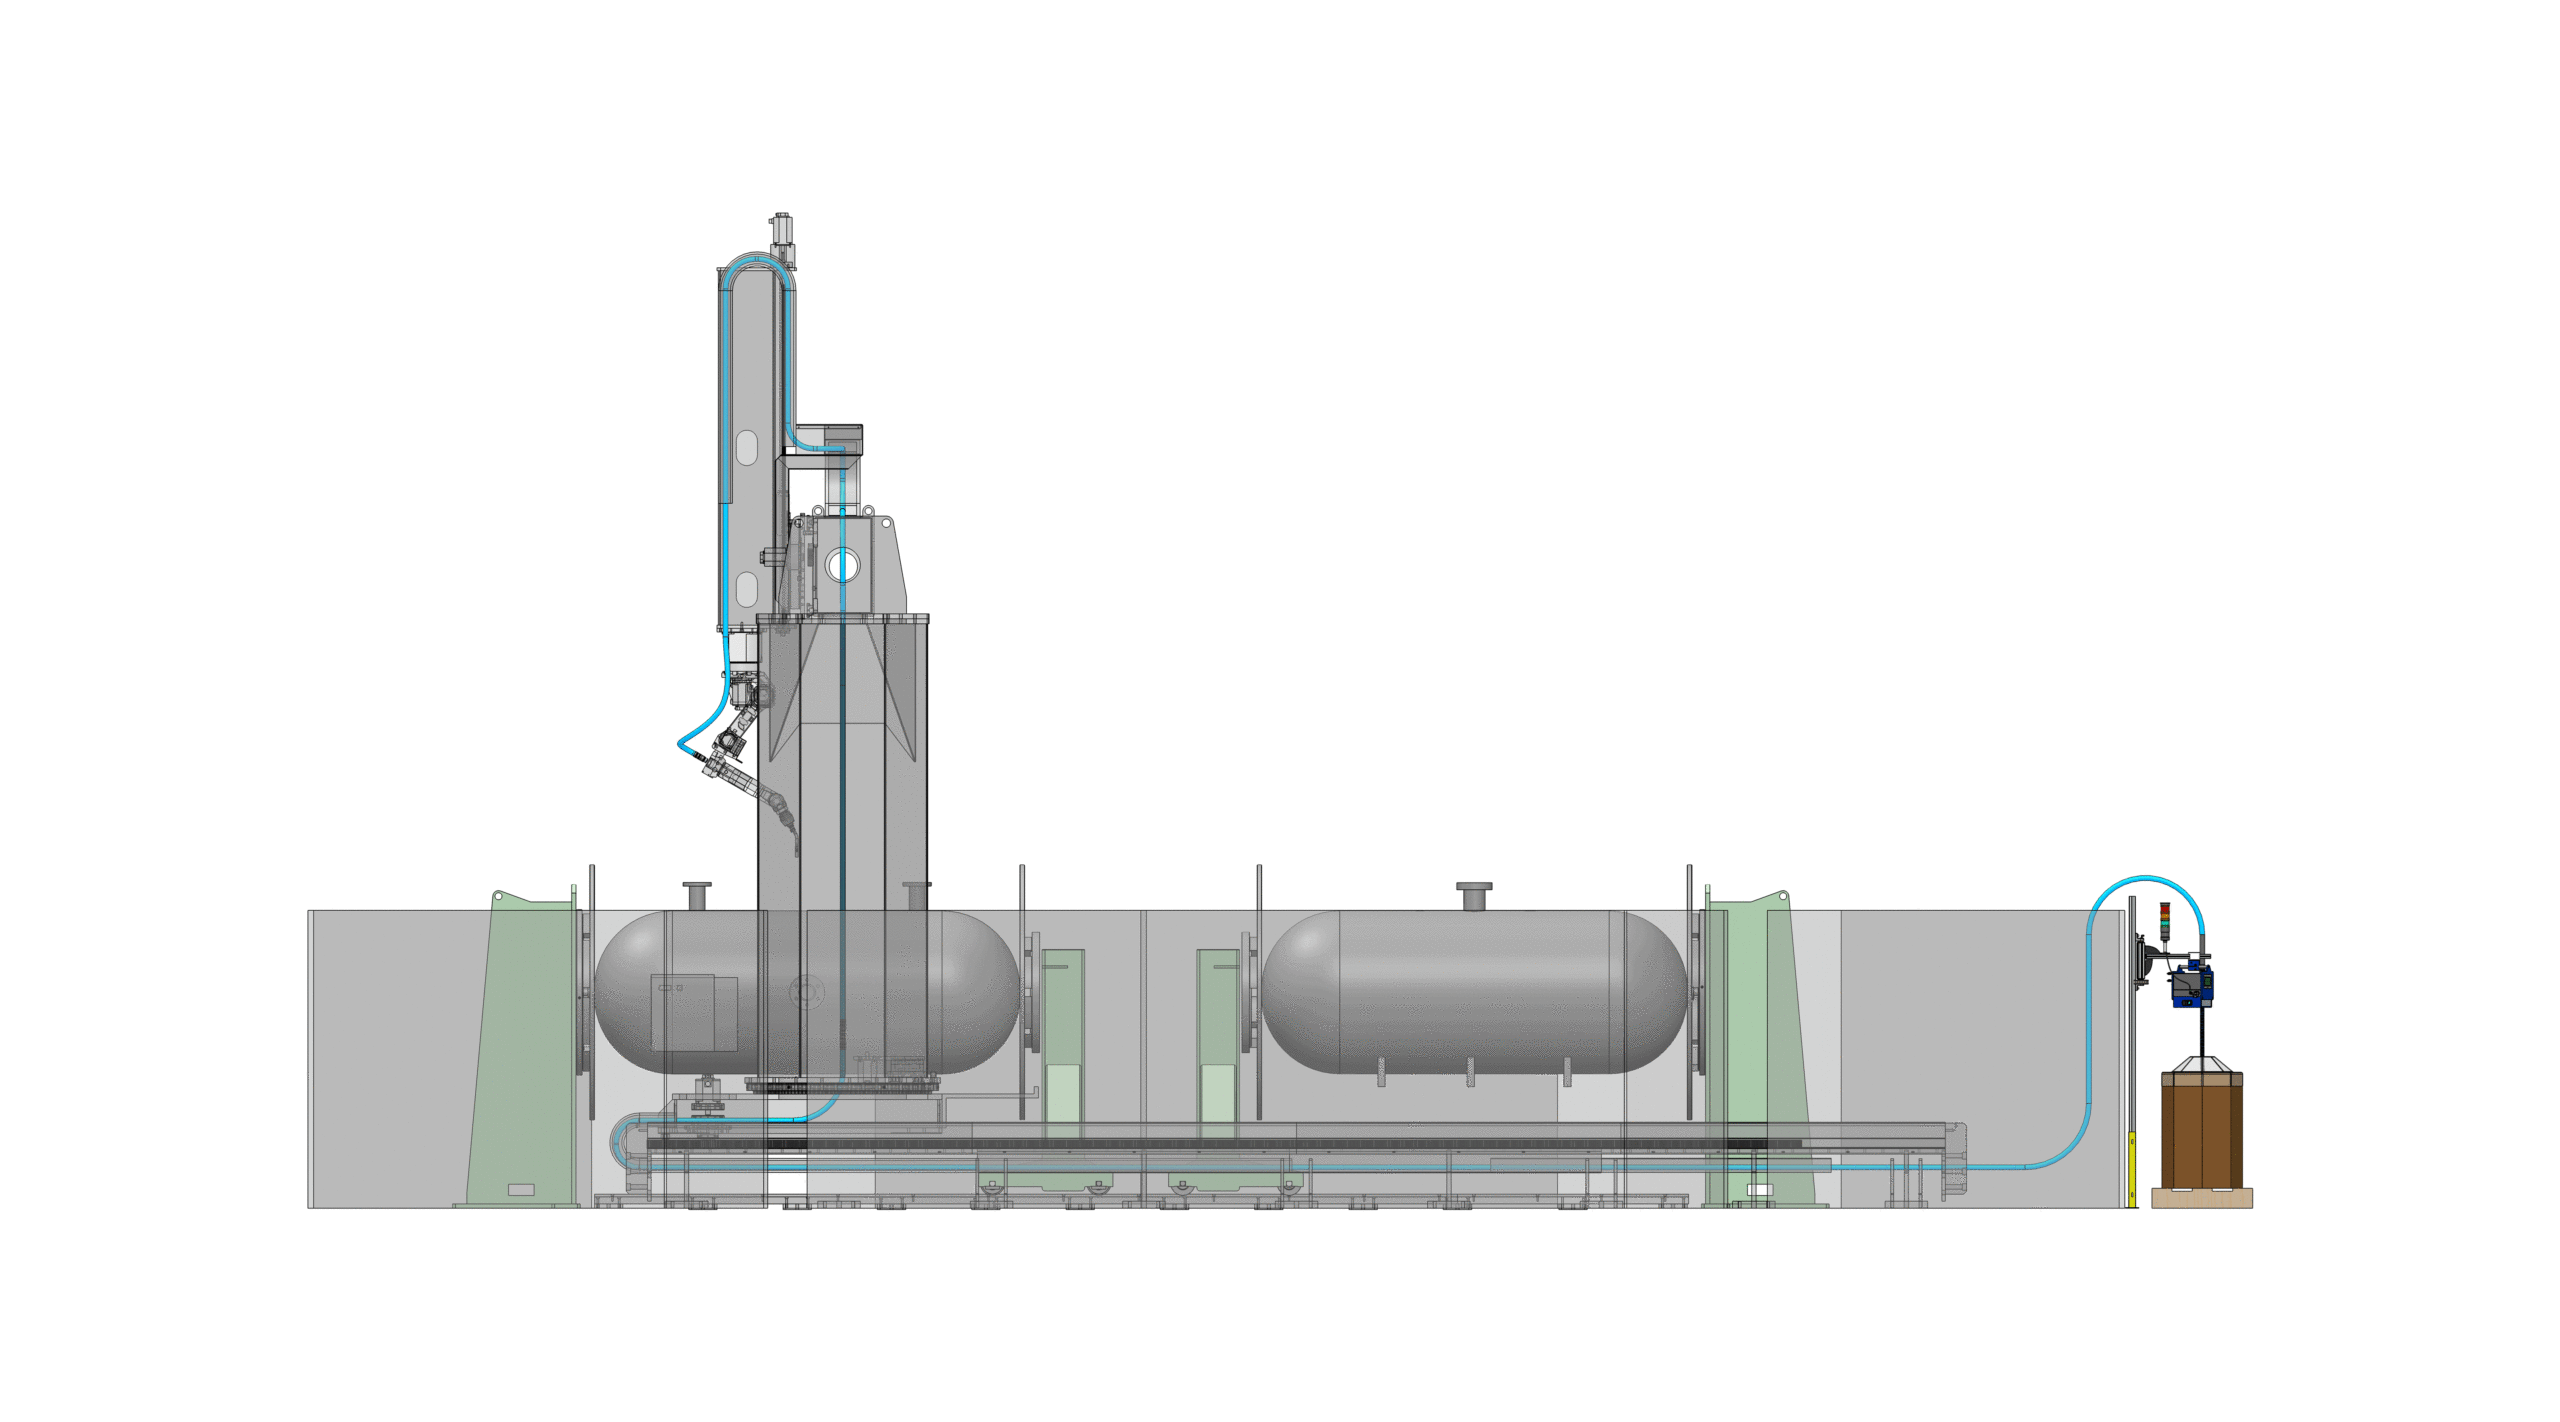
Example of "Wire Farm" with bulk packs positioned at a central location and SmartBoosters pushing the welding wires through long conduits placed inside the cable tracks
Choose, from the below options, the configuration that would best work for your equipment and welding process
1
Welding wire delivered through a relatively short curved Maxiglide conduit. Normally not longer than 10 meters but with fewer and wide curves the conduit can be longer.
Setup components
1. Wire Pack (all formats)
2. swivel supporting arm (optional)
3. Maxiglide with quick end connectors
4. front feeder fitting
2
Welding wire with residual tension, delivered through a relatively short curved Maxiglide conduit. The recommended maximum length is 10 meters but with fewer and wide curves the conduit can be longer.
Setup components
1. Wire Pack (all formats)
2. Twister
3. Swivel supporting arm (optional)
4. MaxiGlide with quick end connectors
5. Front feeder fitting
3
Welding wire delivered through a long curved Maxiglide conduit, normally placed inside the cable tracks. (consult the SmartBooster section for recommended lengths and available SmartBooster models)
Setup components
1. Wire Pack (all formats)
2. Swivel supporting arm
3. SmartBooster (auxiliary rear feeder)
4. MaxiGlide with quick end connectors
5. Front feeder fitting
4
Welding wire with residual tension, delivered through a long curved Maxiglide conduit, normally placed inside the cable tracks. (consult the SmartBooster section for recommended conduit lengths and available SmartBooster models)
Setup components
1. Wire Pack (all formats)
2. Twister
3. Swivel supporting arm
4. SmartBooster (auxiliary rear feeder)
5. MaxiGlide with quick end connectors
6. Front feeder fitting
5
Welding wire delivered through a long curved Maxiglide conduit specially if placed inside the cable tracks, with remote control box connected to the robot PLC. (consult the SmartBooster section for recommended lengths and available SmartBooster models)
Setup components
1. Wire Pack (all formats)
2. Empty Pack sensor (optional)
3. Swivel supporting arm
4. SmartBooster (auxiliary rear feeder)
5. Robot PLC remote control box.
6. MaxiGlide with quick end connectors
7. Front feeder fitting
6
Welding wire with residual tension, delivered through a long curved Maxiglide conduit, normally placed inside the cable tracks, and box for full control by the robot PLC. (consult the SmartBooster section for recommended lengths and available SmartBooster models)
Setup components
1. Wire Pack (all formats)
2. Twister
3. Empty Pack sensor
4. Swivel supporting arm
5. SmartBooster (auxiliary rear feeder)
6. Robot PLC remote control box
7. MaxiGlide with quick end connectors
8. Front feeder fitting
7
Welding wire delivered through a long curved Maxiglide conduit, normally placed inside the cable tracks, with the addition of a conventional conduit when it is necessary to travel for the last part through a constrained space like a the robot arm or a very tight cable track. (consult the SmartBooster section for recommended lengths and available SmartBooster models)
Setup components
1. Wire Pack (all formats)
2. Swivel supporting arm
3. SmartBooster (auxiliary rear feeder)
4. MaxiGlide with quick end connectors
5. conventional conduit with end adapter (with ¼" male thread)
6. front feeder fitting (with ¼" female thread)
8
Welding wire delivered through a long curved Maxiglide conduit, normally placed inside the cable tracks with the addition of a conventional conduit when it is necessary to travel for the last part through a constrained space like a the robot arm or a very tight cable track. The remote control box gives the robot PLC full control. (consult the SmartBooster section for recommended lengths and available SmartBooster models)
Setup components
1. Wire Pack (all formats)
2. Empty Pack sensor (optional)
3. Swivel supporting arm
4. SmartBooster (auxiliary rear feeder)
5. Robot PLC remote control box
6. MaxiGlide with quick end connectors
7. Conventional conduit with end adapter (with ¼" male thread)
8. Front feeder fitting (with ¼" female thread)
9
Welding wire delivered through a relatively short Maxiglide conduit and suitable 24/7 endless domes and accessories.
Setup components
1. twin endless Wire packs, with properly identified START and END wires
2. suitable endless domes
3. wire guiding wheels
4. Swivel supporting arm
7. MaxiGlide with quick end connectors
8. Front feeder fitting
10
Welding wire delivered through a long curved Maxiglide conduit, normally placed inside the cable tracks, with suitable 24/7 endless domes and accessories. (consult the SmartBooster section for recommended lengths and available SmartBooster models)
Setup components
1. Twin endless Wire packs with properly identified START and END wires
2. suitable endless domes
3. wire guiding wheels
3. Swivel supporting arm
5. SmartBooster (auxiliary rear feeder)
7. MaxiGlide with quick end connectors
8. Front feeder fitting
11
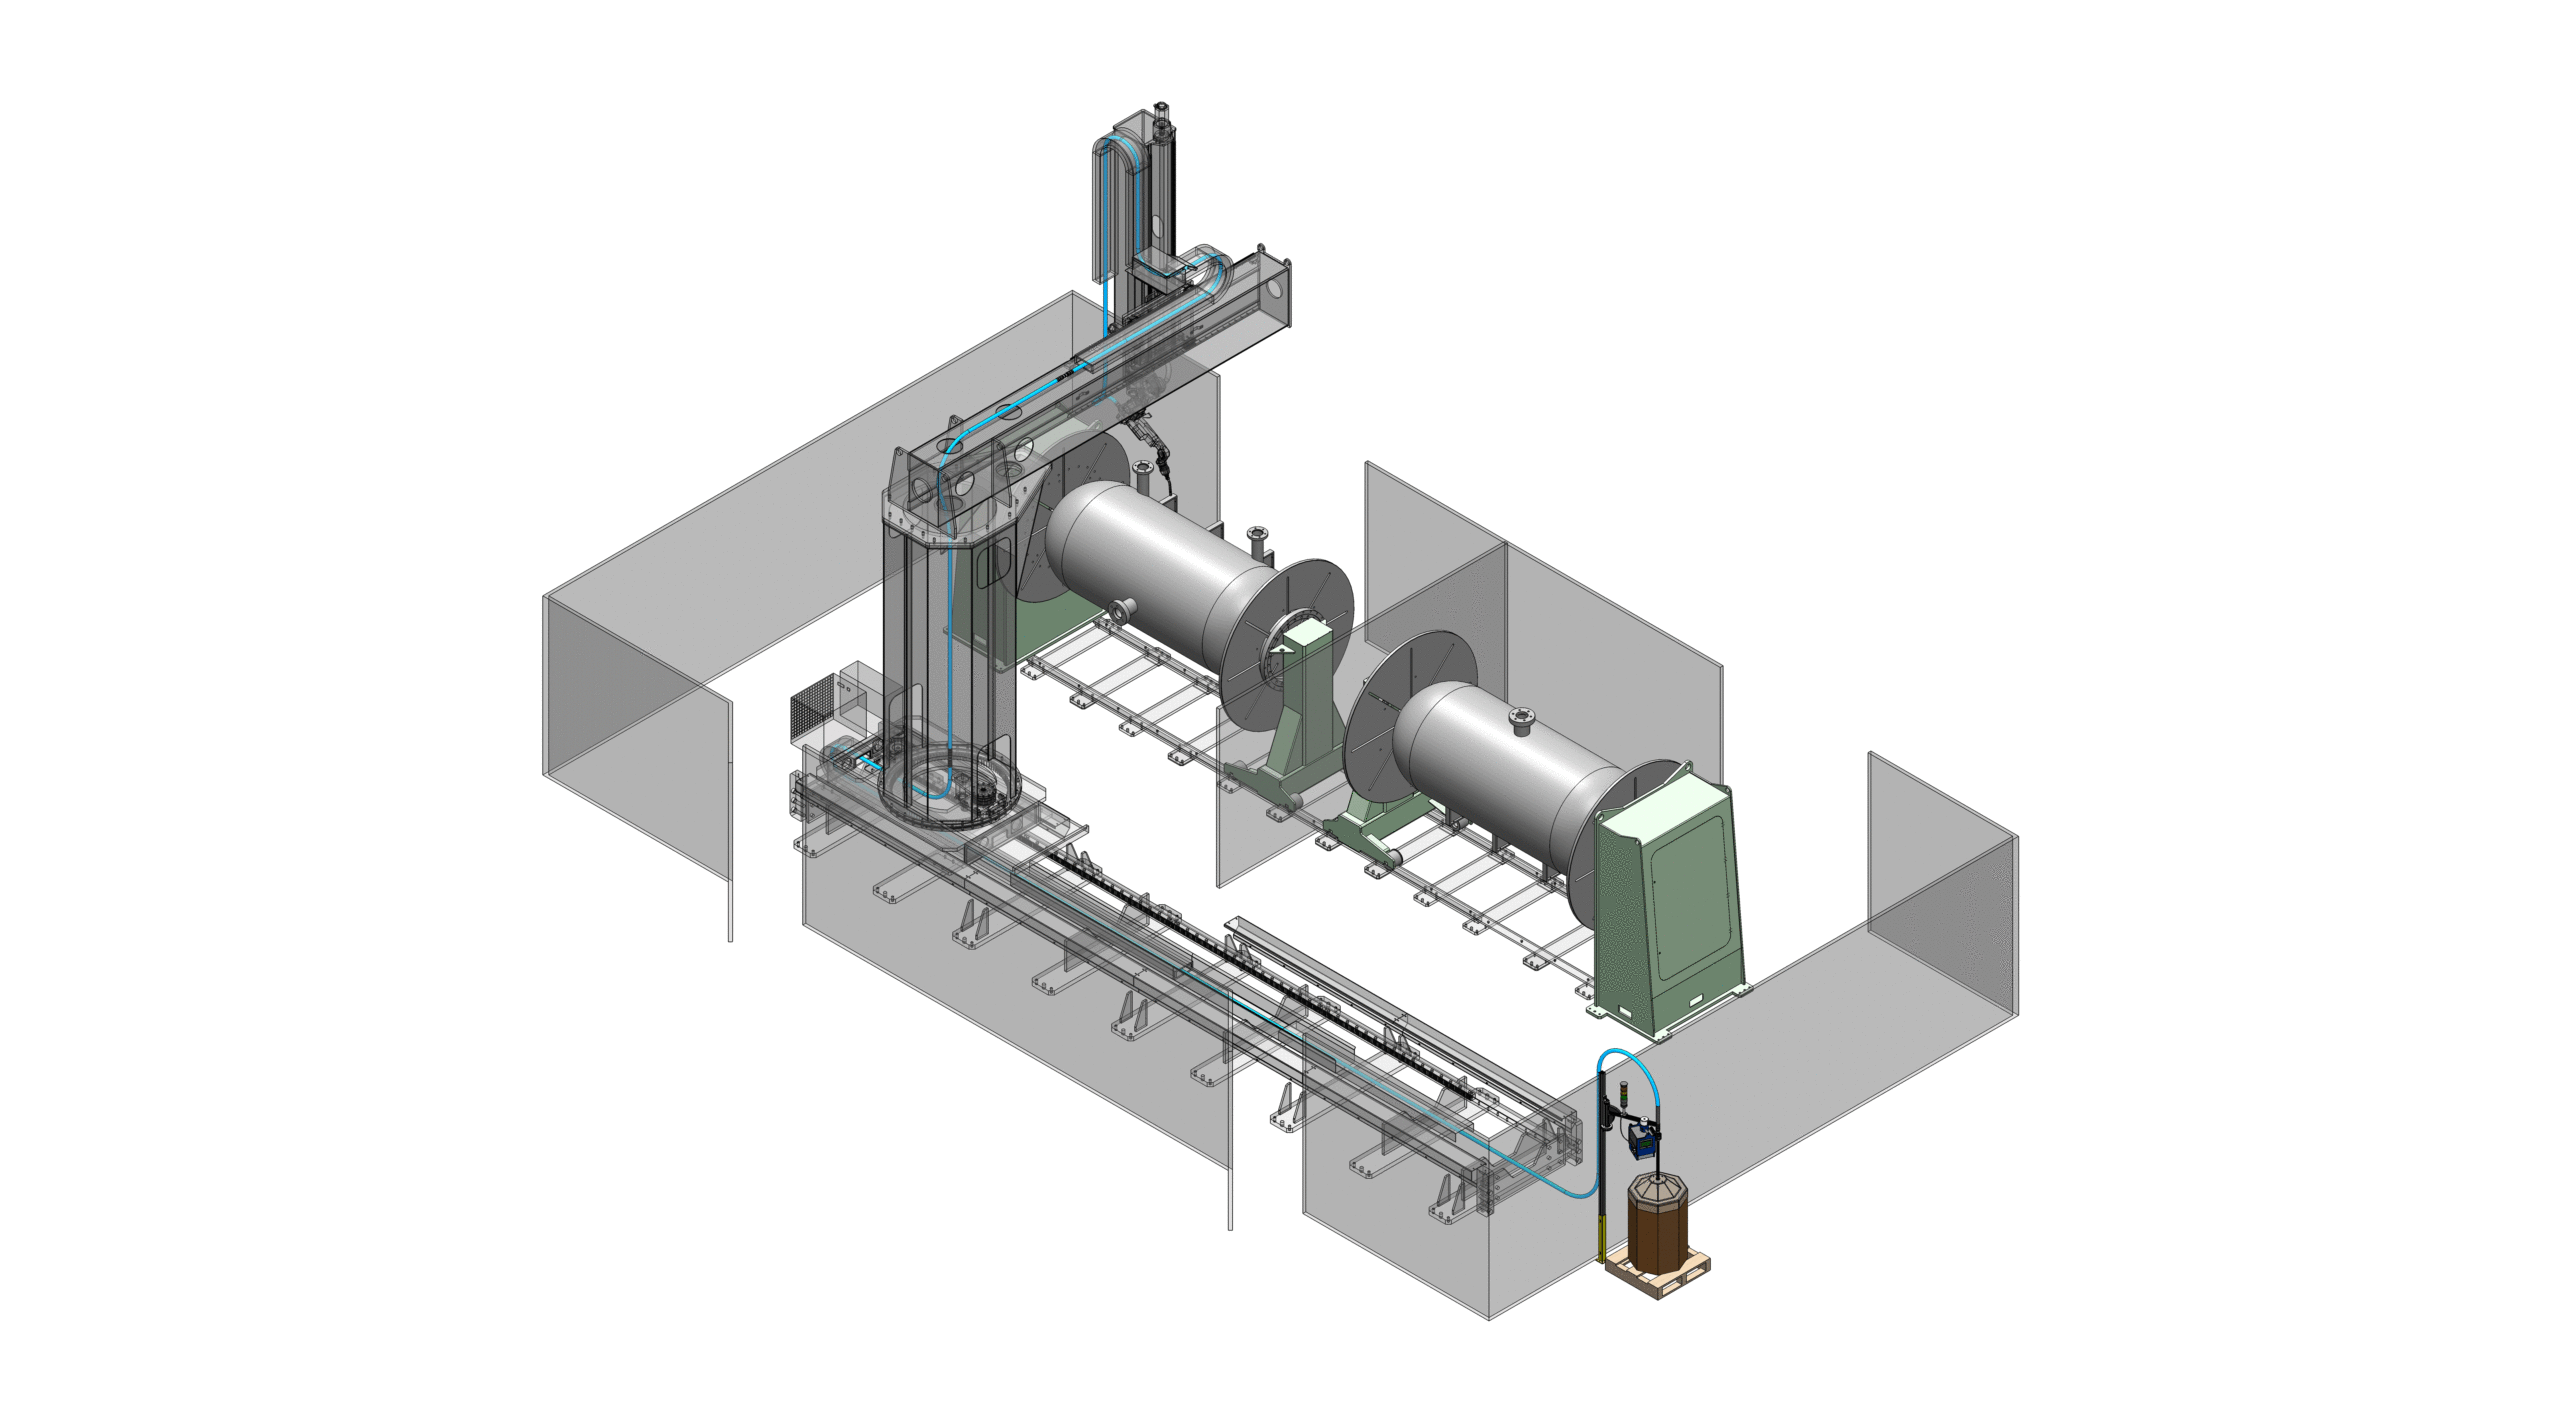
In those manual welding applications where the feeder hangs from a boom, this type of setup allows the use of bulk packs instead of spools and can really help minimise the changeover downtime (1 hour is generally lost every 4 spool changes); it can also address the safety concerns for welders who are frequently forced to manually load heavy spools onto the feeder spool holder.
Setup components
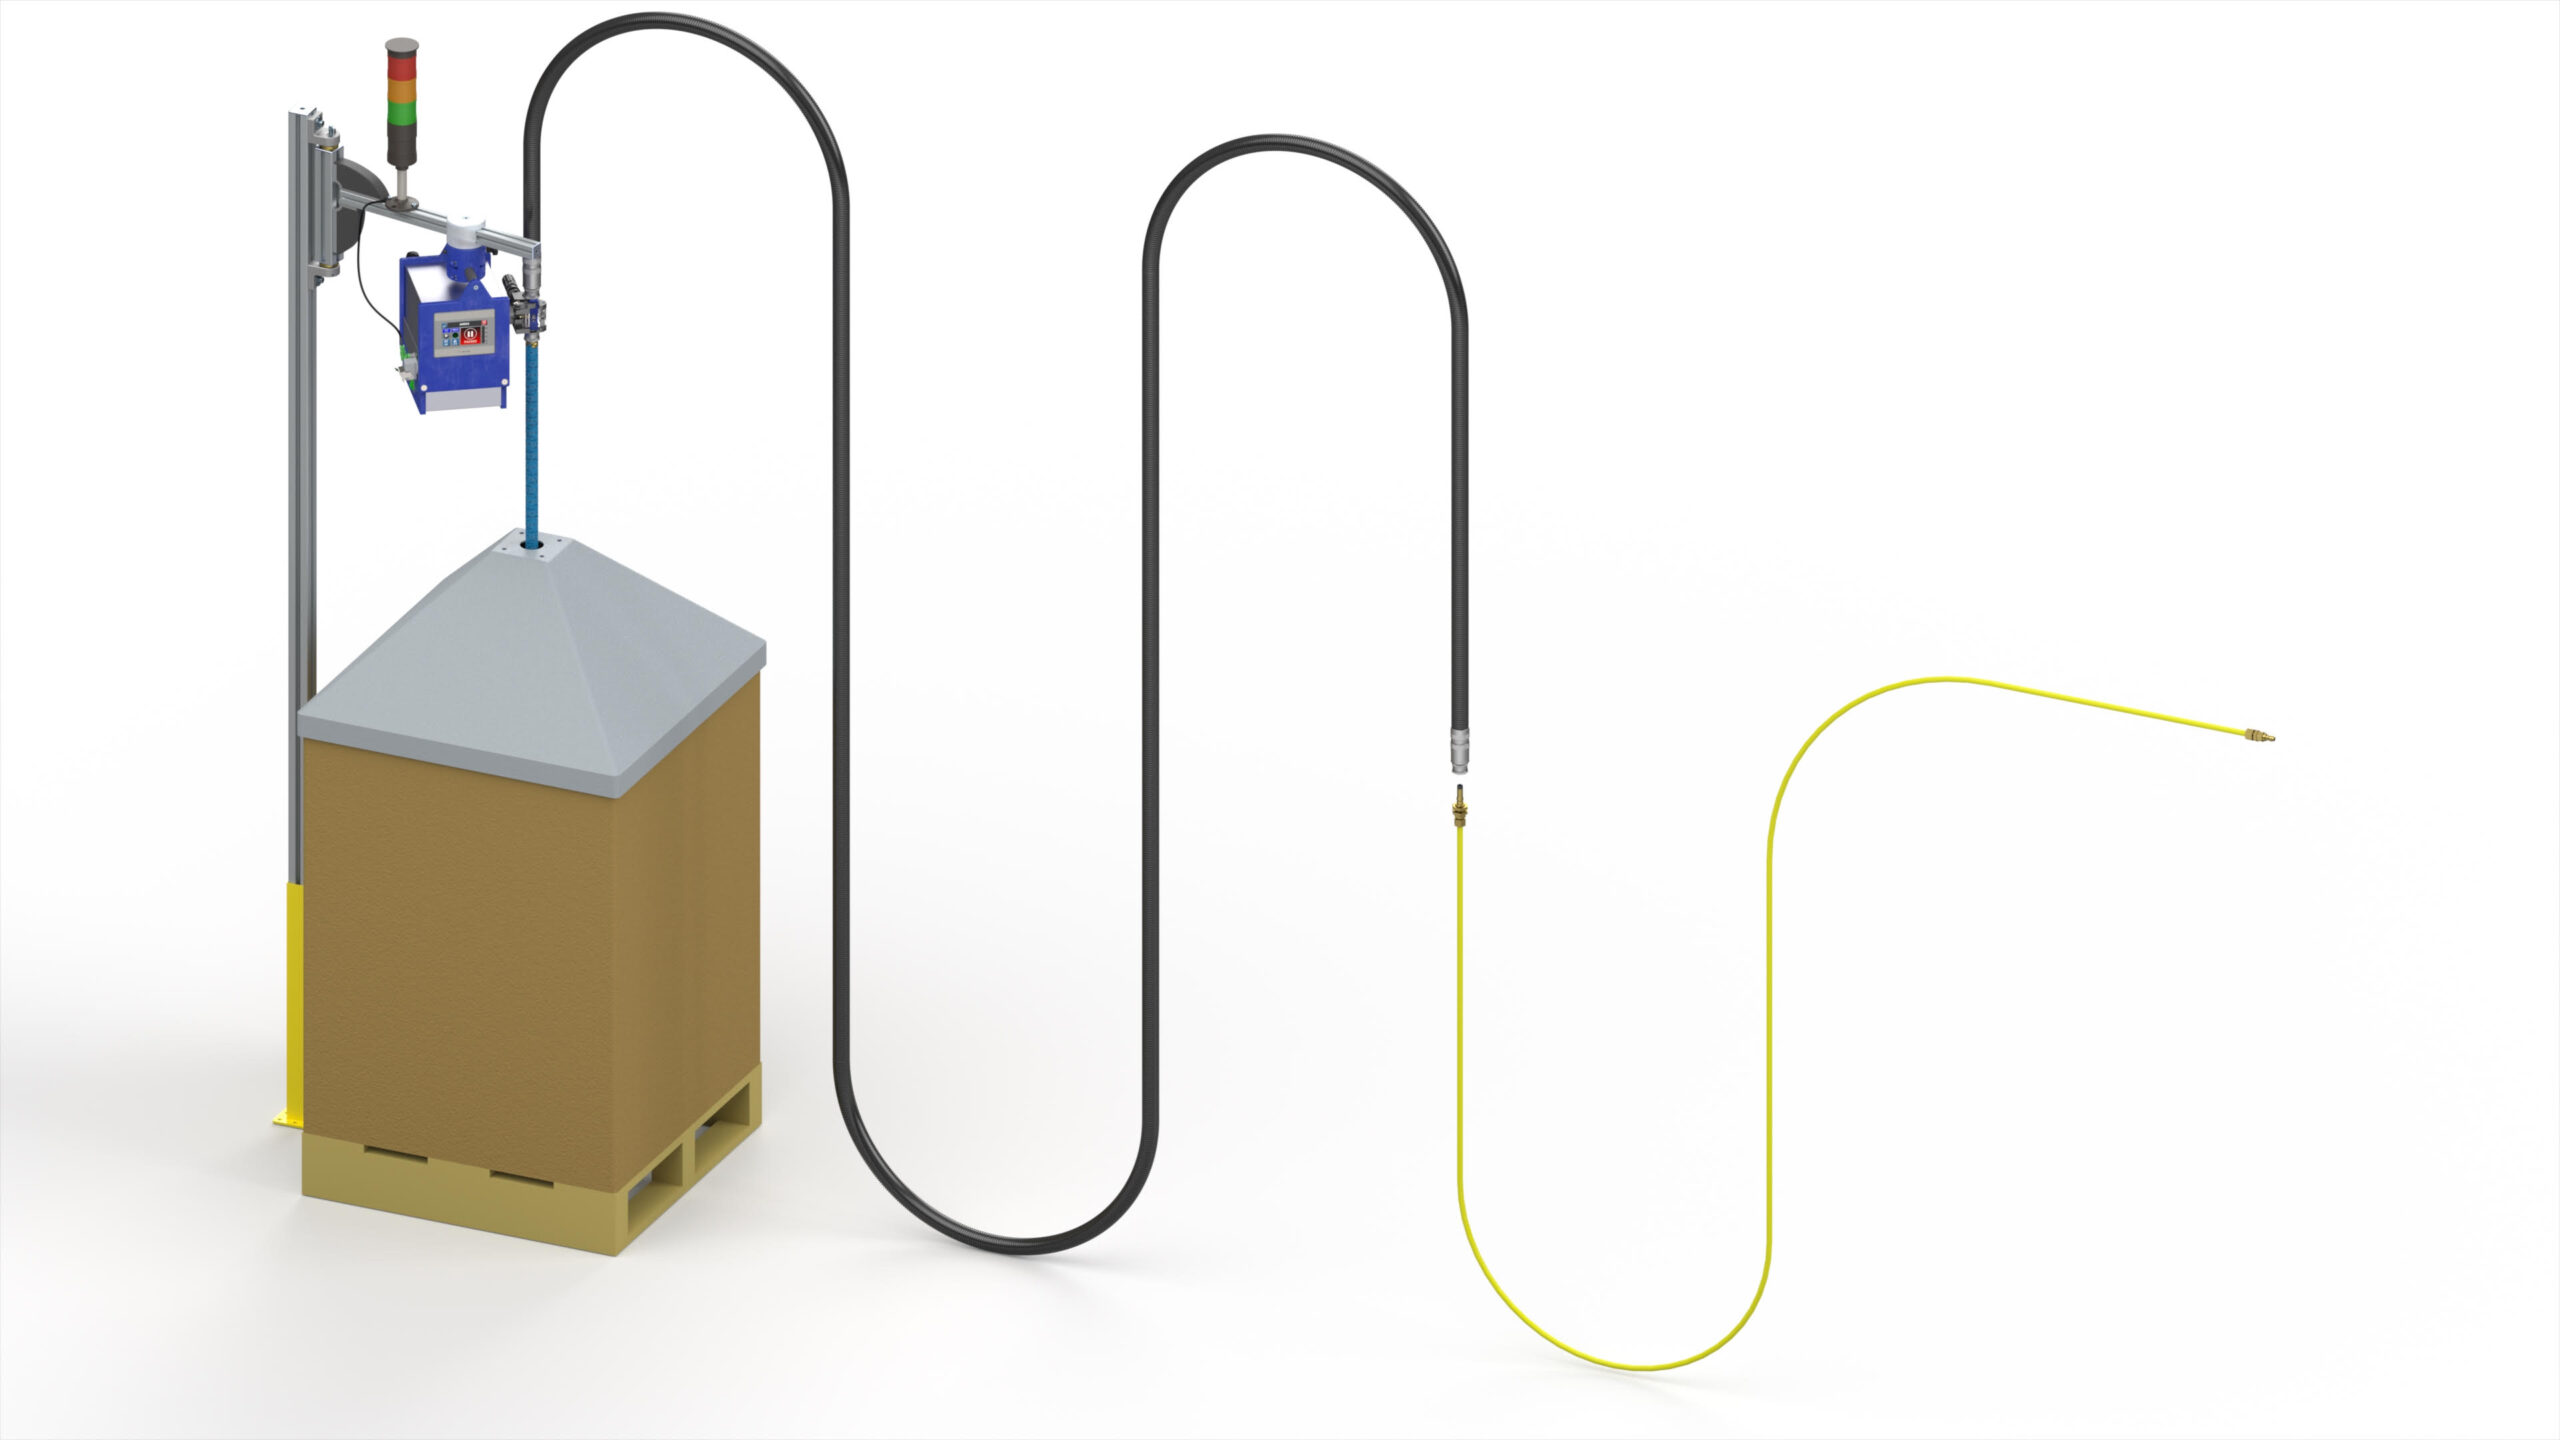
1. Wire Pack (all formats)
2. Swivel supporting arm
3. SmartBooster (auxiliary rear feeder)
4. MaxiGlide with quick end connectors
5. "T" shaped supports for Maxiglide at curves (optional /recommended)